Even in 2023, printers and copiers still play a crucial role in the office! When you run into issues it can bring the processes you take for granted to a grinding halt.
So you want to know how to go about fixing them, right? Well, you might want to save this guide to your bookmarks!
Today, we will delve into the most common issues faced with office printers, copiers and multifunctional devices to equip you with printer troubleshooting solutions to overcome these problems. Whether it’s a paper jam, poor print quality, or connectivity issues, we’ve got you covered. At Document Solutions, we understand the importance of smooth printing operations, and we’re here to help you overcome these obstacles.
Let’s get into it!
A quick word on safety
Before diving into specific problems, it’s essential to establish some troubleshooting basics to ensure safety and effectiveness. Follow these guidelines to avoid accidents or damage to the devices:
- Disconnect the power: Before performing any troubleshooting steps, ensure the printer is turned off and unplugged from the power source.
- Beware of hot components: Some printer parts, such as fusers, can become hot during operation. Allow them to cool down before handling or inspecting them.
- Refer to the user manual: Familiarise yourself with the specific safety instructions provided by the printer manufacturer. If you don’t have a physical copy of these manuals you can find them on the brand websites for major printing brands like Epson, Konica Minolta and Brother.

The 9 Most Common Printer Problems and Solutions
Now that you know what precautions to take while trying to fix a printer, let’s take a look at how to solve some of the most common issues you might face. If you are already facing an issue and want to jump to a specific section, use the links below to get where you need to go!
- Paper Jams
- Poor Print Quality
- Connectivity Issues
- Error Messages and Codes
- Slow Printing Speed
- Printer Not Detected
- Scanning Issues
- Printer Spooler Errors
- Ink or Toner Cartridge Problems
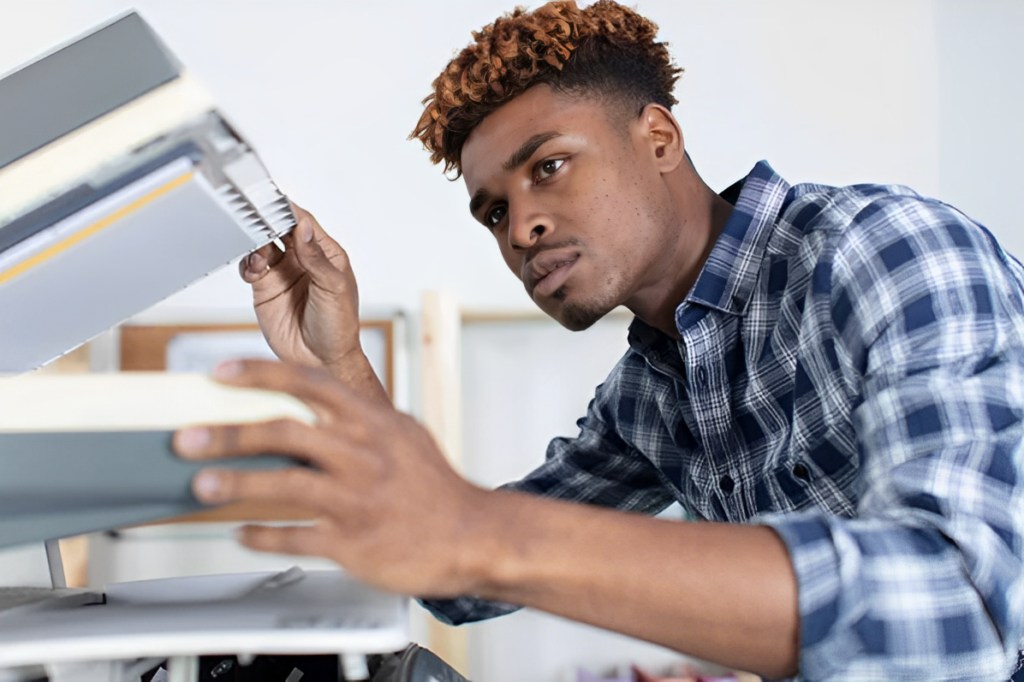
1. Paper Jams
One of the most common printer issues is paper jams. Follow these steps to clear paper jams effectively:
- Identify the jammed paper: Check the display or indicators for guidance on the paper jam’s location.
- Open the printer: Carefully open the printer’s access panels or trays to gain access to the jammed paper.
- Remove the paper: Gently pull the jammed paper out in the direction it would normally travel. Be cautious not to tear the paper, as remnants can cause future jams.
- Close the printer: After successfully removing the jammed paper (or if you have determined that you cannot safely remove the paper), ensure all access panels are securely closed before resuming printing.
Unable to easily get all the paper out? Is the printer still saying there’s a jam even though it looks clear? This is not the time to get the tool kit out!
If you can’t easily remove the paper then it’s time to call in the professionals to service the printer. If you are already working with a managed printing service provider this will be a simple matter of booking in a service and the printer will be up and running in no time
2. Poor Print Quality
If your prints exhibit faded text, streaks, or smudges, follow these troubleshooting steps to improve print quality. Note that steps 2-4 are quite complex so make sure you have properly read the instruction manual and know that you can perform the tasks comfortably!
- Check ink or toner levels: Ensure that the ink or toner cartridges have sufficient levels to produce high-quality prints. Replace or refill them if necessary.
- Clean the printer heads: Over time, printer heads can accumulate dust and debris, leading to print quality issues. Consult your printer manual to learn how to clean the printer heads properly.
- Align the print heads: Printers with alignment features allow you to calibrate the print heads for optimal performance. Access the printer’s settings menu and initiate the alignment process.
- Use the correct paper type: Select the appropriate paper type in the printer settings to ensure optimal print quality.
- Replace damaged consumables: If the print quality issues persist, consider getting a professional to replace any damaged or worn-out parts, such as cartridges or drums.
3. Connectivity Issues
Another common issue is when a printer fails to connect to your computer or network. Try the following troubleshooting steps:
- Check network connectivity: Verify that your printer is connected to the same network as your computer. Ensure the network cables are securely connected and that Wi-Fi settings are correct
- Restart the printer and computer: Sometimes, a simple restart can resolve connectivity issues. Power off both the printer and the computer, then turn them back on after a few seconds.
- Update printer drivers: Outdated or incompatible printer drivers can cause connectivity problems. Visit the printer manufacturer’s website to download and install the latest drivers for your specific printer model.
- Verify printer settings: Access the printer settings menu to ensure that the correct network settings are configured. Check if the printer is set to “offline” mode and switch it back to “online” if necessary.
- Disable firewall or antivirus software temporarily: In some cases, firewall or antivirus software may block the printer from connecting to the network. Temporarily disable these programs and test the connection.
- Reset network settings: If all else fails, try resetting the printer’s network settings to default. Refer to the printer’s user manual or the manufacturer’s support website for instructions on how to perform a network reset.

4. Error Messages and Codes
Error messages and codes can provide valuable insights into printer issues. Here’s how to troubleshoot common error messages:
- Understand the error message: Read the error message carefully and refer to the printer’s user manual or the manufacturer’s support website to understand the specific error and its meaning.
- Perform recommended actions: Error messages often come with suggested actions to resolve the issue. Follow the provided instructions to troubleshoot the problem.
- Power cycle the printer: Sometimes, a simple power cycle can clear certain error messages. Turn off the printer, unplug it from the power source, wait for a few seconds, then plug it back in and power it on.
- Update firmware: Outdated printer firmware can contribute to error messages. Visit the printer manufacturer’s website and download the latest firmware for your printer model. Follow the instructions to update the firmware.
5. Slow Printing Speed
If your printer is experiencing sluggish printing, consider the following troubleshooting steps:
- Optimize print settings: Adjust print settings to a lower quality or draft mode for faster printing. However, keep in mind that this may affect print quality.
- Update printer drivers: Outdated drivers can impact printing speed. Visit the printer manufacturer’s website and download the latest drivers for your printer model.
- Clear print queue: A large print queue can slow down printing. Open the print queue on your computer and cancel any pending print jobs that are no longer needed.
- Upgrade printer memory: Some printers allow memory upgrades to improve printing speed. Check your printer’s specifications to determine if memory expansion is possible.
When your computer fails to detect the printer, try these troubleshooting steps:
Completed all the steps and it’s still too slow? Unable to upgrade your printer memory? Perhaps it’s time to upgrade! Find your match today:


")
6. Printer Not Detected
When your computer fails to detect the printer, try these troubleshooting steps:
- Check physical connections: Ensure that the printer is securely connected to the computer via USB or Ethernet cables. If using wireless connectivity, make sure the printer and computer are on the same network.
- Restart printer and computer: Power off both the printer and the computer, then turn them back on after a few seconds.
- Reinstall printer drivers: Uninstall the existing printer drivers from your computer and reinstall them from the manufacturer’s website to ensure you have the latest and compatible drivers.
- Try a different USB port or cable: Faulty USB ports or cables can prevent the computer from detecting the printer. Connect the printer to a different USB port or try using a different USB cable.
- Disable conflicting software: Certain software applications, such as virtual machine software or security tools, can interfere with printer detection. Temporarily disable these programs and check if the printer is detected.
7. Scanning Issues
If you encounter problems with scanning, follow these troubleshooting steps:
- Check scanner connections: Ensure that the scanner is properly connected to the computer via USB or network cable, depending on the scanner type.
- Restart scanner and computer: Power off both the scanner and the computer, then power them back on after a few seconds to refresh the connection.
- Update scanner drivers: Outdated or incompatible scanner drivers can cause scanning issues. Visit the scanner manufacturer’s website to download and install the latest drivers for your specific scanner model.
- Check scanner settings: Verify that the scanner settings are configured correctly. Ensure the appropriate scanning mode, resolution, and file format are selected.
- Test with different software: If you’re experiencing scanning problems with specific scanning software, try using a different scanning application to determine if the issue is software-related.
- Clean the scanner glass and feeder: Dust, smudges, or debris on the scanner glass or feeder can affect scanning quality. Clean these areas using a lint-free cloth and a non-abrasive cleaner recommended by the scanner manufacturer.
8. Printer Spooler Errors
Printer spooler errors can disrupt the printing process. Follow these steps to troubleshoot spooler issues:
- Restart the spooler service: Open the Services menu on your computer, locate the Print Spooler service, and restart it. This action clears any pending print jobs and refreshes the spooler.
- Clear the print queue: Access the print queue on your computer and cancel any stuck print jobs. Deleting the print queue contents can resolve spooler errors.
- Reset spooler settings: In some cases, resetting the spooler settings can resolve persistent spooler errors. Stop the Print Spooler service, delete the files in the Spooler folder, and restart the service.
- Update printer drivers: Outdated or incompatible printer drivers can contribute to spooler errors. Download and install the latest drivers from the printer manufacturer’s website.
9. Ink or Toner Cartridge Problems
Issues with ink or toner cartridges can impact printing quality and performance. Follow these steps to troubleshoot cartridge-related problems:
- Check ink or toner levels: Verify the ink or toner levels in your printer. Replace or refill cartridges that are low or empty to ensure consistent printing.
- Clean the cartridge contacts: Remove the ink or toner cartridges and gently clean the metal contacts using a lint-free cloth. This process ensures proper electrical connections.
- Reset ink or toner levels: Some printers require manual resetting of ink or toner levels after cartridge replacement. Refer to the printer manual for instructions on how to reset the levels.

When to Enlist Managed Printing Services
While many common issues can be resolved using the printer troubleshooting steps provided, there are situations where professional assistance becomes invaluable. Consider enlisting the services of Document Solutions in the following scenarios:
- Hardware failure: If your printer experiences major hardware failures, such as a faulty print head or a broken component, professional intervention is necessary.
- Complex network setup: If your office has multiple printers and requires intricate network configurations, professionally managed printing services can streamline the setup process and optimize network performance.
- Large-scale printing requirements: For businesses with high-volume printing needs, managed printing services can ensure efficient printing operations, supply management, and proactive maintenance.
- Print Management Software requirements: If you need to monitor your printer and copier usage by department or user and only allow printing secure accounts.
- Ongoing technical support: Document Solutions offers dedicated technical support to address any printer-related issues promptly, minimizing downtime and maximizing productivity.
While many problems can be resolved through these troubleshooting steps, it’s important to recognize that some issues may require professional intervention. That’s where Document Solutions comes in. As a trusted provider of managed printing services, we offer expertise in handling complex network setups, large-scale printing requirements, and ongoing technical support. Our team of professionals can ensure that your printing infrastructure operates smoothly, allowing you to focus on your core business tasks.
Don’t let printer and copier problems hinder your productivity. Implement the troubleshooting solutions provided in this blog, and when you need expert assistance, reach out to Document Solutions. With our managed printing services, we can make your printing operations more efficient and hassle-free.